
Logistic Regression using Python in Power BI
- Jul 5, 2020
- 3 min read
In this article we will take a look at the implementation of Python code on Power BI. We will implement Prediction Model (the Logistic Regression) model in the Power BI using Python. Input data file is fetched on the Power BI.
Steps implemented:
Load data in Power BI
Create training and testing data using Python script in Power BI
Implement Logistic Regression for the Prediction
Include the prediction Output of logistic regression in the data
Note that I am using Power BI on Windows and for Python I have set the home directory as Anaconda3 and Python is present in that directory as follows:
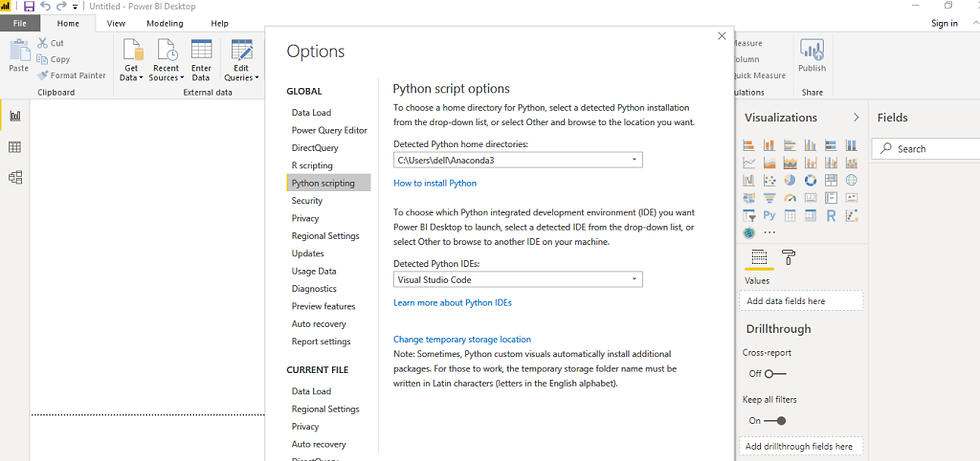
(I am using Anaconda Jupyter notebook for Python.)
STEP 1: Load the data in Power BI
The input file for this implementation is present on the local machine. Hence Click on the get data and selecting the file format same as the input file format that is CSV. And hit to connect option. During the load selecting the none as the File origin then Comma as Delimiter since it’s CSV file and then click on the Load option. This will load our input CSV file that is InputTableFeatures.


STEP 2: Create training and testing data using Python script in Power BI
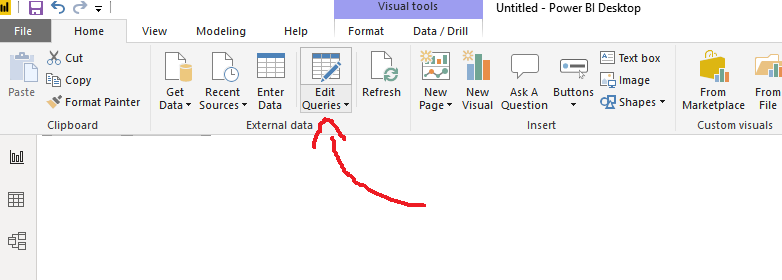
After loading the file click on the Edit Queries. This will open a new window of Power BI as shown in the picture 2. Now go click to Transform here it will show the Python option. Click on the Python option this will open Python Script Window. Now we will type python code here in this script and will see the output.


Now we will paste the following lines of code into the Python script editor.
1
2
3
4
5
6
7
8
9
10
11
12
13
import pandas as pd
import numpy as np
from sklearn.preprocessing import LabelEncoder, StandardScaler
from sklearn.model_selection import train_test_split
from sklearn.linear_model import LogisticRegression
y = dataset[['Output1']] # creating y dataframe. To show this in the Output
features = ['Feature1', 'Feature10', 'Feature11', 'Feature2', 'Feature4', 'Feature5', 'Feature3', 'Feature7', 'Feature8', 'Feature9', 'Feature6']
X=dataset[features] # selecting the input features
# split data into train and test dataset
X_train,X_test,y_train,y_test = train_test_split(X,y)


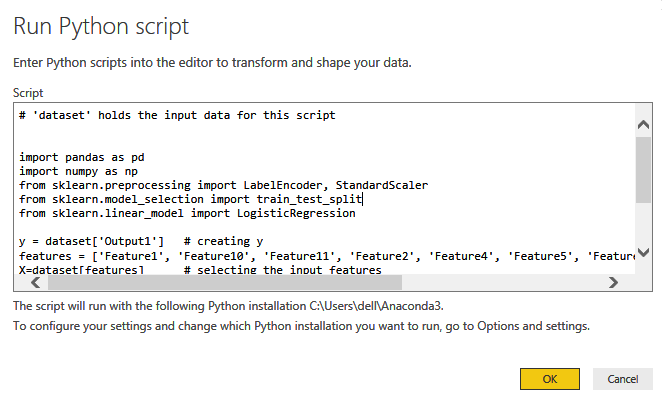
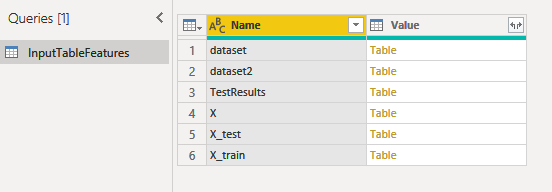
And run the code by clicking on Ok. This will create some tables as shown in the pictures. It will ask for the Privacy levels for this demonstration I am going to select ignore and save. This will execute the Python code and will create 7 tables include dataset (which holds all the columns).
STEP 3: Implement Logistic Regression for the Prediction
Now data is divide into training and testing we will train the Logistic regression algorithm for the Prediction. Now again open the Python Editor by clicking on “Run Python script” in Query setting on the right hand side as shown in the picture. This will reopen the editor.

Now append the following lines of code to train and test the prediction algorithm:
1
2
3
4
5
6
7
8
9
10
11
12
13
14
15
16
17
18
19
20
21
22
23
#Training logistic regression
log = LogisticRegression()
log.fit(X_train,y_train)
#testing the algorithm
y_pred_test = log.predict(X_test)
y_prob_test = log.predict_proba(X_test)
# creating pandas dataframe to hold the results of testing data
TestResults = pd.DataFrame(y_test)
TestResults ['y_pred'] = y_pred_test
TestResults ['y_prob'] = y_prob_test[:,1]
# predicting for all the inputs in the feature table
y_pred = log.predict(X)
y_prob = log.predict_proba(X)
#To print the output of the algorithm on whole data we will create new table
dataset2 = dataset[['Feature1', 'Feature10', 'Feature11', 'Feature2', 'Feature4', 'Feature5', 'Feature3',
'Feature7', 'Feature8', 'Feature9', 'Feature6', 'Output1']]
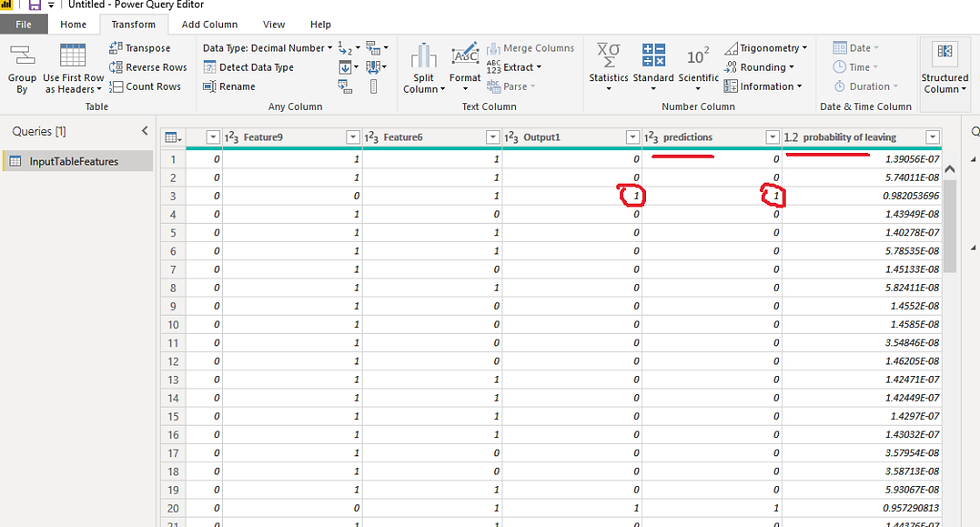
dataset2['predictions'] = y_pred
dataset2['probability of leaving'] = y_prob[:,1]
This will create following set of tables as the output:
If we select the dataset 2 we can see the prediction for whole dataset as follows
That’s it. In the above demonstration I have explained how we can implement prediction model in Power BI using Python. If you have any questions fee free to ask below in the comment section. Also if you like my article please like and subscribe to my blog 🙂


Comments