
Google BQ, Steps to Create a dataset and a table
- Jul 6, 2020
- 3 min read
In this article we will take a look at basics of Google BQ and also simple steps to create Dataset in Project and table in that dataset on Google BQ platform.
About BQ
What is Google Big Query?
BigQuery is a serverless Platform as a Service (PaaS) , highly-scalable, and cost-effective cloud data warehouse with an in-memory BI Engine and machine learning built in.
There is no infrastructure to manage. One can focus on uncovering meaningful insights using familiar SQL without the need for a database administrator.
BigQuery is a RESTful web service that enables interactive analysis of massive datasets working in conjunction with Google Storage.
BigQuery provides external access to the Dremel technology, a scalable, interactive ad hoc query system for analysis of read-only nested data.
Features of BQ:
Managing data
create and delete tables based on a JSON-encoded schema,
import data encoded as CSV or JSON from Google Storage. (Note that if data is small in size we can directly import the data to BQ)
Query
the queries are expressed in a standard SQL dialect and the results are returned in JSON with a maximum reply length of approximately 128 MB, or an unlimited size when large query results are enabled.
Integration
BigQuery can be used from Google Apps Script (e.g. as a bound script in Google Docs), or any language that can work with its REST API or client libraries.
One can use Google API to interact with Google BQ from their Python program.
Access control
is possible to share datasets with arbitrary individuals, groups, or the world.
This is important. In commercial projects you may got access to client’s BQ tables on your Google BQ.
In this article we will take a look at the steps to create a data set and a table on Google Big Query. I have explained it in simple 4 steps. Let’s start with step 1:

Project, Datasets and tables on Google BQ
Assumptions or Prerequisites:
You have created Google Cloud Platform Account
You have access to your Google BQ
Step 1: Login and open your Google BQ web UI
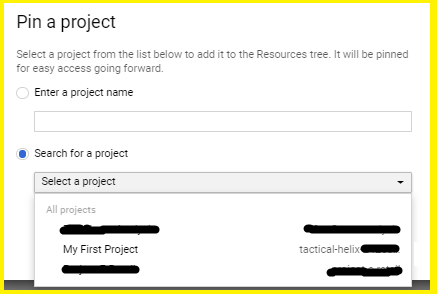
Step 2: Select the Project in which we want to create a new data set.
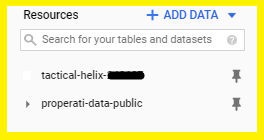
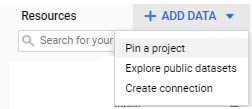
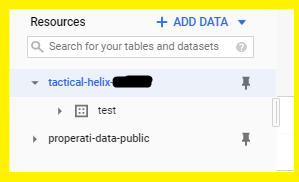
Click on “Resources” in the Navigation panel
From the resources to select one of the existing project that previously being created press “Pin a project” button.
In our case we will select or pin My First Project.
After adding this resource we can see “tactical-helix…” in the Resources.


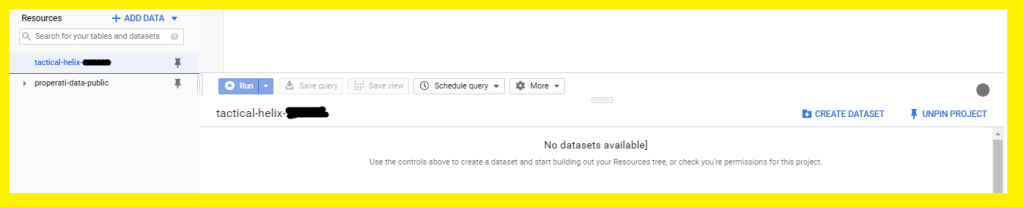
Step 3: Create a dataset in selected Project.
In the navigation panel, in the Resources section, select your project.
On the right side of the window, in the details panel, click Create dataset.


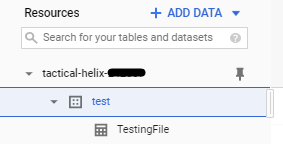
Step 4: Create table under created dataset.
Creating a table under “test” dataset. For the simplicity purpose I am going to upload a sample file created for the explanation purpose as a table into dataset. The sample file TestingFile.csv having following fields and content:
Select dataset “test”. On the right side we will have button “CREATE TABLE” as shown in the picture 1.
Now in Create table from select upload option. It will detect the File format.
Selecting the Auto detect option but one can define the columns specifically.
Also it is simple and small file hence I am not going to select the Portioning option. (Note please read partitioning in detail from the google website. This is very useful feature to use).
Note that I am not inserting any integer value under number of Header rows to skip (In practice you remember to insert the value e.g. 1st line is column name in the file then insert 1 indicating skip the 1st row. )
Click “Create Table”. As we can see in the picture 4 in the slides below the new table is being created under test dataset. If we click on the table name on the right side we will get all the information regarding the table


Simple query to display the content of the table:
Now just to check the values we will fire a simple query on the table that we just created from the Query editor of the UI.
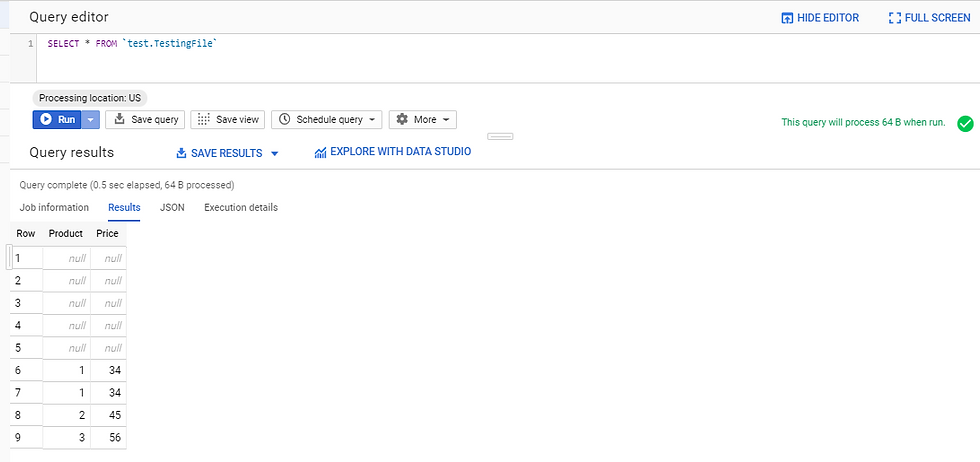
As we can see there are 5 rows with null values. That indicates we we did not selected number of first 5 rows to be skipped at the time of table creation under the “Header rows to skip”.
Hence we have learned how to create a simple dataset and a table under it. For more detailed you can visit and explore more about table creation on Google BQ website.
Points to be noted:
To upload big size files please refer the google official site. You may need to use Google Cloud Storage in that case. Similarly if file to be donloaded from BQ is big then we need to copy big file from BQ to Google Cloud Storage and from Cloud Storage we can pull it to the destination location.
One can delete a created table just by selecting the table and clicking the delete table button. Also if you want to sharing of tables is also possible.
To know more about how to pull data from BQ please check this article
If you have any questions regarding the article please feel free to ask in the comment section below. Also please like and subscribe 🙂

Comments