
Access data in Power BI from Jupyter notebook
- Jul 5, 2020
- 1 min read
In the previous article we saw how to implement a prediction model in Power BI using Python. Their we generated input training, testing tables as well as input features table along with the prediction output.

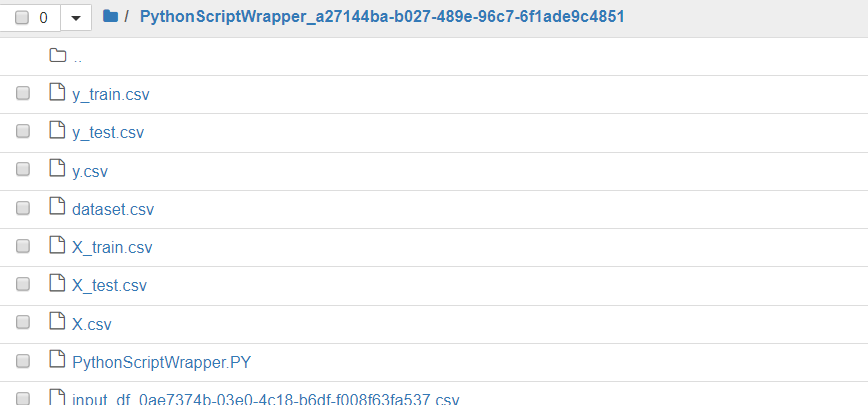
Tables created in Power BI during Prediction
In this article we will take a look at how to access those tables using Jupyter notebook.
STEPS:
Access data from Jupyter notebook
Calculating accuracy of the prediction in Jupyter.
In the following explanation I am using Anaconda-Jupyter notebook on Windows and Python 3.
Access data from Jupyter notebook
Now start the Anaconda Navigator and Jupyter notebook. This will open a Jupyter notebook in the browser.

If you recall in the previous article the python used in Power BI was located in Anacond directory. Therefore I should be able to see newly created data files from Jupyter’s home page as follows. Click on Last modified. This show the latest directory is added which is our python script and it’s output which we executed on Power BI. Hence we can see the files in the directory.


Now we will create a new Jupyter notebook in the same directory and will print these files in it.

Now we will import the file dataset using Pandas and print the Output and the
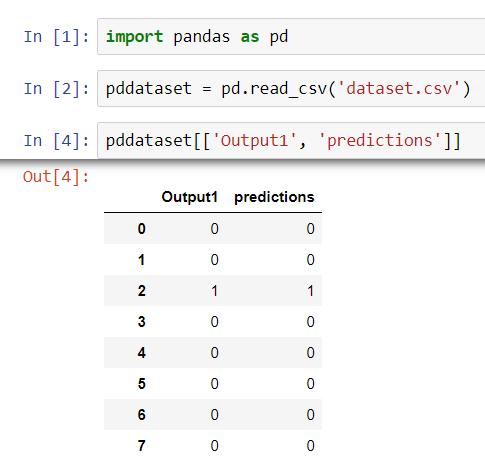
We will calculate the accuracy of the Prediction by calculating Correct predictions divided by total predictions made. as follows:

That’s it for this article. We have seen how to access the files we have created during the prediction model implementation on Power BI. If you have any questions feel free to ask. Also if you like my article please like and subscribe to my blog. 🙂


Comments